REQUEST TIME OFF OR LEAVE
How-To: Request an Absence
Use this guide to request a leave of absence within Workday. For Faculty leave policies, visit the Mines HR Website. For Classified leave policies, visit the Colorado DHR Website. Students are not benefit eligible, but per the Colorado Healthy Families and Workplaces Act students earn 1 hour of sick leave per every 30 hours worked. All leave accruals can be found in Workday: My Profile > Absence > Absence Balance
-
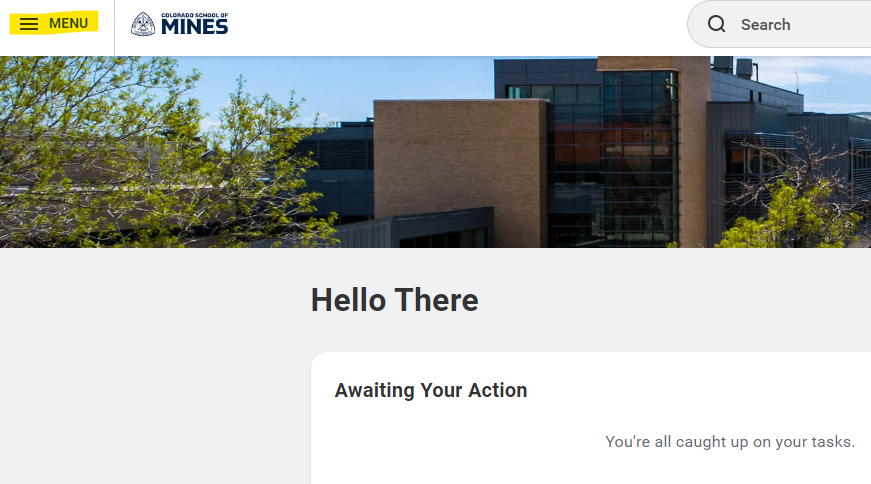
From your Workday homepage, click the Menu in the upper left corner.
-
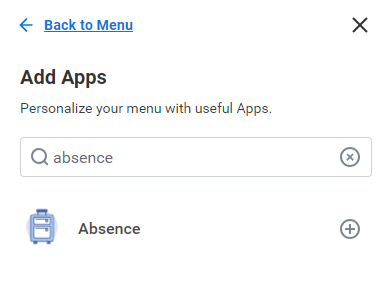
If you do not already have the “Absence” applet, click Add Apps in the bottom of the menu panel.

-
Type “Absence” in the Find Apps search bar and hit enter.
-
Use the (+) to add the applet to your menu. Once added, click Back to Menu.
-
From the menu, click the Absence applet. You will be redirected to a new screen. From here, click Request Absence.

-
The Absence Calendar will appear. On the left hand side of the calendar, you will see your current accumulated sick time. This is your available balance.
-
On the calendar, select the applicable date(s) of the sick leave. (Tip: You can click and drag to select multiple consecutive days).
-
Once the dates are selected, click the blue Request Absence button in the bottom left corner.

-
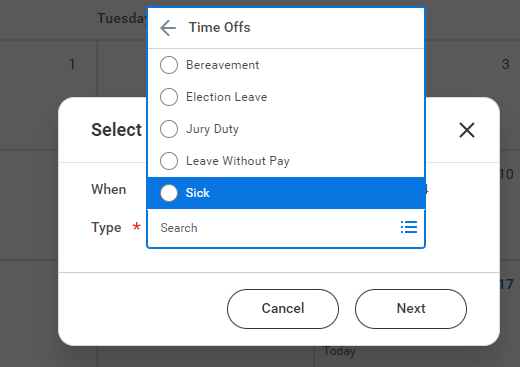
The Select Absence Type box will appear. Click the Type box and choose the applicable leave type.
-
The next screen will allow you to enter the number of hours of leave per day. If more or less hours per day are needed, click the Edit Quantity per Day button to make this change. If no changes are needed to the quantity per day, click Submit. The request will be sent to your Workday supervisor for approval.

In Workday, “Absence” refers to time off or leave. You start the process the same way for either request, then enter applicable information for your request type. Here is an alternate method of requesting leave than what is outlined above.
- Click the Search bar, enter Request Absence, and select the task. You can also start from the Absence Application.
- Select the applicable date(s). You can select from a calendar menu at the top of the screen or click and drag on the calendar view.
- From the bottom left corner, click Request Absence. The number of days you requested displays on the button.
- Using the Prompt icon, select the Type of absence requested. Important: This is how you indicate if your request is for a time off type or a leave type.
- Click Next.
- Click Edit Quantity per Day to change the daily duration(s) as needed.
- Enter the desired Quantity per Day amount and any needed Comments. To update all quantities to the same amount, enter the desired amount in the Update all Quantities field.
- Click Done.
- Using the drag and drop functionality add any relevant supporting documents in the Attachments box or click Select Files to choose a file from your computer.
- Click Submit.
Next: The request routes through reviews and approvals.
CANCEL REQUEST FOR TIME OFF OR LEAVE
An absence request can only be canceled prior to being approved by your supervisor. To cancel an absence request, follow steps 1 - 4 of the How - To Request an Absence guide above. Then, follow these remaining steps:
5. Click the Correct My Absence option.
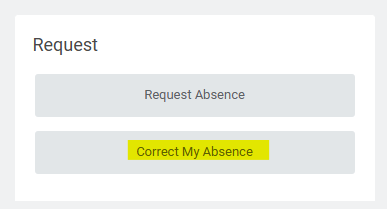
6. Select the pending time off request by clicking on the gray banner.
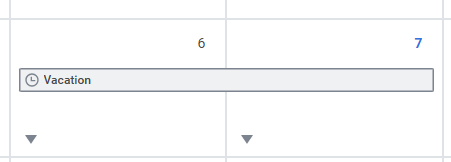
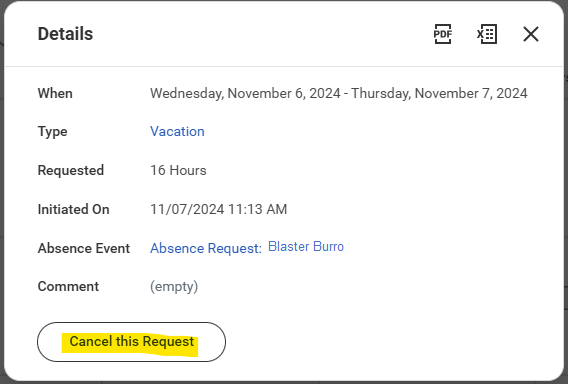
7. Click Cancel this Request. The pop up window will expand. Enter a comment (required) as to why the request is being canceled. Click Submit.
- Click the Workday Inbox.
- Select the Archive tab.
- Click the applicable Absence Request task.
- Click the Cancel button.
- Enter a Comments (required).
- Click Submit.
CORRECT REQUEST FOR TIME OFF OR LEAVE
You can edit a request after it has been fully approved. To do so, follow steps 1-6 of the Cancel Request guide above and then follow the remaining steps below:
7. Click the check box next to the date(s) that need to be corrected. The Type and Quantity per Day fields will auto-populate with the relevant information. To edit the number of hours of leave being used, make edits to the Quantity per Day field. To change the type of leave being requested, update the Type field. Add a comment if you would like (not required). Click Submit.
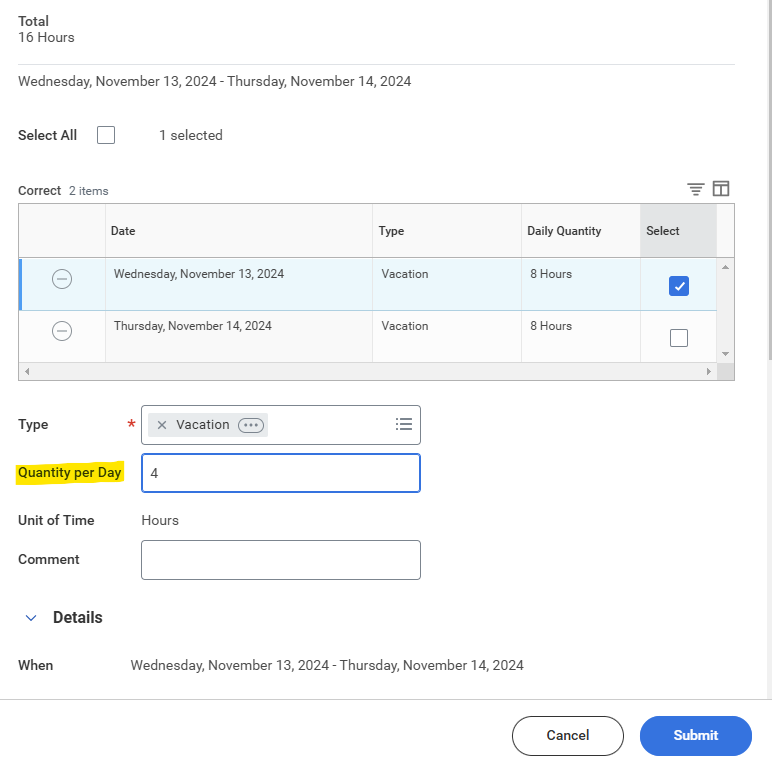
8. The request will be routed to your supervisor for approval.
Use the below steps as an alternate method than what is provided above.
- Click the Search bar, enter Correct My Absence, and select the task. You can also start from the Absence Application.
- Click the applicable time off entry on the calendar.
- Select the date(s) to be corrected or click the Remove Row icon (minus sign) to remove the days.
- Using the Prompt icon, select the Type field to select the appropriate type.
- Adjust the request as needed.
- Enter Comments, if required.
- Click Submit.
Next: The request routes through reviews and approvals.